Showing posts with label Henndigo. Show all posts

Sunday, September 21, 2014

Final Henndigo Recipe and Process

Over the past almost year, I have been Henndigo-ing about every other month or so.  At first, I used to try to cover my newly greying hairline every month.  My hair is quite dark so the greys tend to show more starkly than if my hair was a lighter shade.  I am a bit lazy so to upkeep it every single monthly became a bit cumbersome so every other month has now become my happy medium.

Over time, I have simplified my Henndigo recipe.  I experimented a bit with oils, yogurt, coconut milk, acids, different types of henna, and different types of Indigo.  I found that I am quite  happy with the quality that Henna Sooq offers.  Yes, it is more expensive, particularly when you factor in shipping, but the results are so much better and much more reliable.

I first mix my Hennas (Rajasthani and Red Raj) and allow for 4-5 hours of dye release.  I now just mix it with some steeped hot tea.  Basically, any tea I have on hand that has a red tinge to it.  I have found that a modest amount of Coconut Milk leaves my hair nourished, soft, shinny and makes the Henndigo mix a lot creamier and easy to work with and to rinse out.

From previous research, the standard recommendation is 250 grams for waist length hair,  but since my hair is fine, I use 160 grams for my waist length hair, and usually have some leftover paste that I end up freezing.

Since Indigo needs to be made fresh prior to use, I mix it 10 minutes before I am ready to use it.  I mix it with sea salt and hot (not boiling) water only.  I allow the Indigo to sit for 10 minutes to dye release, and then I carefully mix it into my Henna paste until the mix turns a dark pea green and has no streaks of red in it:

Henna Sooq Rajasthani Henna 96 g (3/4 cup)
Red Raj Henna 32 g (1/4 cup)
16 oz Strongly brewed hot Raspberry tea
¼ can Coconut Milk
Indigo 32 g (1/4 cup)
2 tsp Sea Salt (for Indigo)
_________________

- Mix hennas and tea
- Leave to dye release in bowl covered in plastic for 4 hours.  Afterwards add coconut milk to henna mix
- Mix Indigo with warm water only.  Add salt and mix some more.  Let sit for 5 minutes.
- Mix Indigo paste into Henna paste (mix really well)
- Apply to damp hair and put on a plastic shower cap.  Place woolen cap over shower cap
- Leave on for at least 5 hours and then wash out
- Do not wash again for 48 hrs
________________

Leftover Henna can be stored in freezer for years.  Leftover Indigo needs to be in an airtight baggy in a cool, dry, and dark place and can be stored for 6 months.

I like to apply my paste to dry hair.  Wet hair, even when it's not dripping wet, makes the mix run.  It's bad enough to sit around for 4-5 hours with a muddy paste on top of your head, your head wrapped in plastic, a wool beanie, and a heating cap on.  But, when there are multiple drips running down your face and neck, it's quite unbearable.  I will admit that damp hair makes spreading the paste a smoother process, but I also don't like working with hair that can be more easily damaged if I become impatient and try to rush things.

By now, I don't get paste all over the bathroom like I used to when I first started.  Now, it just mostly gets on the counter top and myself.  Having now have almost a full year's of experience, Henndigo-ing, I do plan to continue using it.  I love the dark plum color the mix yields that eventually settles into dark brown.  It also allows me to continue to grow and/or maintain my hair at this length without damaging it with chemical dyes.  I guess I am also a bit more adventurous since I don't mind the fact that the results are not always exactly the same.  I like the variability and element of surprise.

Good luck to you all Henndigo Heads.  I think that it's really not as complicated as most people make it out to be, but it does take some flexibility and just learning to accept that it is a natural plant based product so every single variable cannot always be controlled at will.

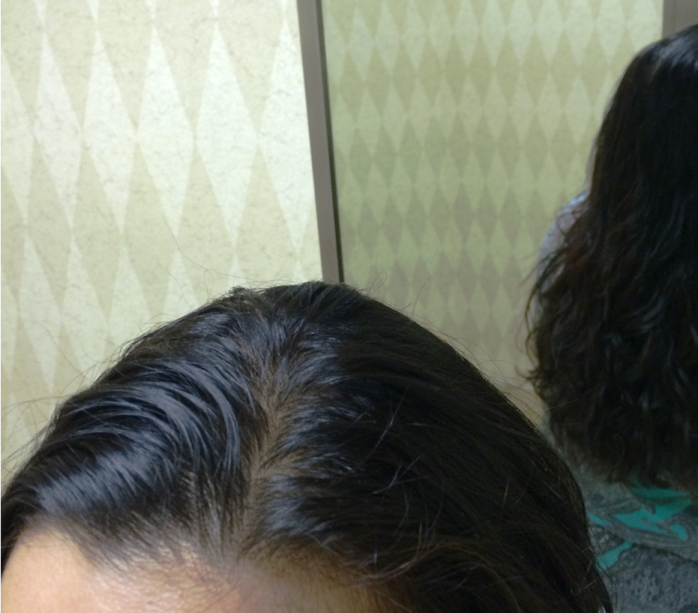
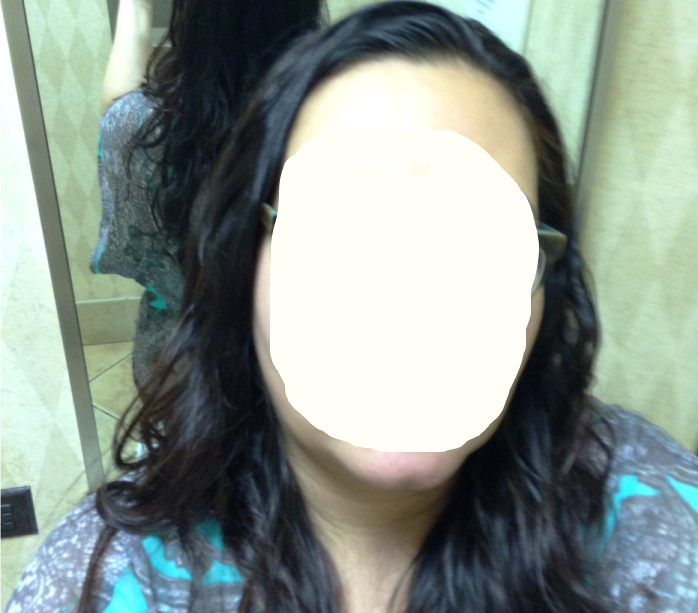
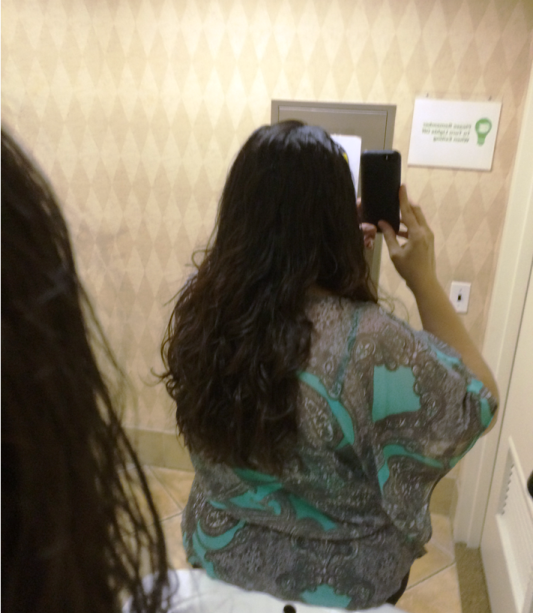
This is my final result:


Saturday, April 5, 2014

Almost Got My Henndigo Routine Just Right!

I have been experimenting with Henndigo since last year.  I began my journey with a rather complicated recipe.  I experimented with adding citrus, yogurt, vinegar, cinnamon, among other things.  What I did find is that coconut milk must stay in my mix.  It is an amazing conditioner when used sparingly, but when over used; too much is just that...too much!

I also experimented with heat and found that it helped my hair absorb color much better.  This is my newly perfected Henndigo recipe and process:

Henna Sooq Rajasthani Henna 96 g (3/4 cup)
Red Raj Henna 32 g (1/4 cup)
16 oz Strongly brewed hot Raspberry tea (although any herbal tea will work.  I just prefer a red tea)
¼ can Coconut Milk
Organic Indigo 32 g (1/4 cup)
2 tsp Sea Salt (for Indigo)
_________________

- Mix hennas and tea.  The paste should be the consistency of Greek yogurt.
- Leave to dye release in bowl covered in plastic for 4 hours.  After dye release, add coconut milk to henna mix
- Mix Indigo with hot water only.  Add salt and mix some more.  Let sit for 5 minutes to release dye.
- Mix Indigo paste into Henna paste (mix really well)
- Apply to damp hair and put on a plastic shower cap.  Place a woolen cap over a disposable plastic shower cap
- Leave on for at least 5 hours and then wash out (you can use a heat cap on medium for more intense color)
- Rinse out, condition, and do not wash again for 48 hrs
________________

Leftover Henna can be stored in freezer for years.  Leftover Indigo needs to be in an airtight baggy in a cool, dry, and dark place and can be stored for 6 months.

So, it is no secret I get my Henna from Henna Sooq.  The quality of their Henna and Indigo is really top notch and they advertise their Lawson content (the ingredient that tells you how much color will be released onto your hair).  They have good customer service and have a consistent supply.  Remember Henna/Indigo is imported and comes from a plant so it's not as if there is an unlimited supply at any given time.  Henna/Indigo requires that you buy in quantities that will last you for several months.  What is nice is that now if you order over $75, they ship it to you for free.

I usually prepare my Henna really late the night before or really early the same morning.  Some people like to sleep with it on their head so the dye does its work overnight, but I can't fall asleep with a wet head wrapped in plastic.  I am fully aware that I will have to let it sit for a number of hours before it's ready for use so I try to plan ahead.  After it's ready, I mix my Indigo with really hot water:

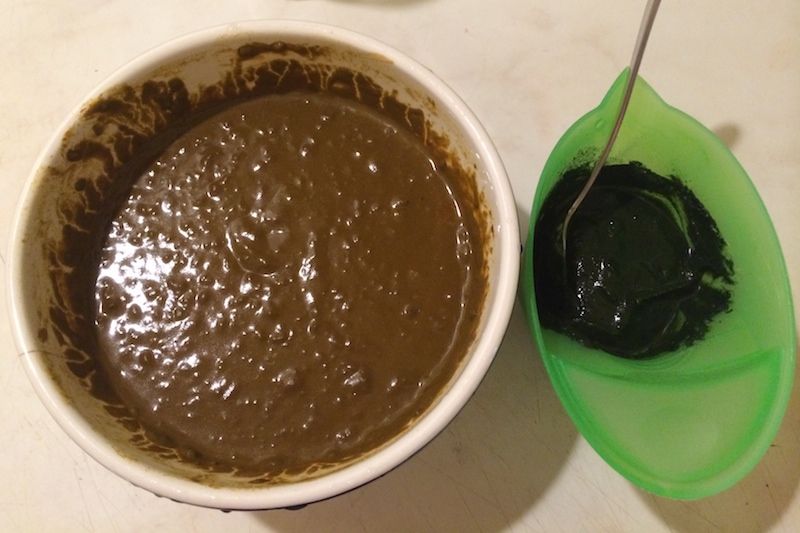
Dye released Henna on the left an dye released Indigo on the right
Once both mixes are ready, the Indigo needs to be mixed really well into the Henna.   I apply it immediately.  Indigo is quite impatient and will not wait for you so it's important to mix it when you are ready to use it.  I apply my Henndigo paste with rubber gloved hands.  Some people like to use a bottle applicator or a plastic brush, but since my mix comes out like mud or a nice thick frosting, I like using my hands to spread it, and smooth it onto my hair.  I like to apply to it to damp hair.  As far as color, it doesn't matter if the hair is dry or dampened, but it is a lot messier when you have to apply it to dry hair.  Make no mistake applying this paste to your hair will be messy.  Your first time you will get it all over everything so cover any items you wish to protect.

After all the sections are saturated with paste, I bun my hair atop my head and put on my disposable shower cap.  I then use Saran Wrap to cover my sideburns.  Afterwards, I put on a wool cap and put on my glasses (with legs wrapped in cling film) so I don't have to see the world out of focus for the next 5 hours.

Woolen Cap
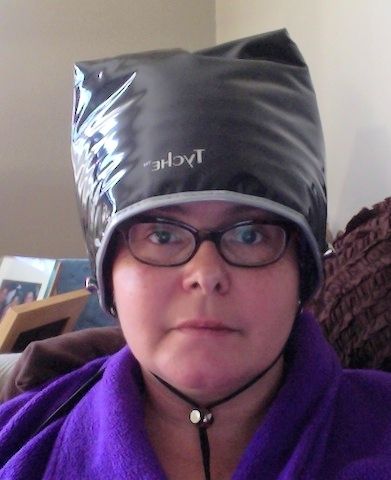
I then put on my heat cap on medium for the next 5 hours and catch up on some Netflix.

Heat Cap

Once the 5 hours are up, I rinse the paste out of my hair until the water runs clear.  This is another time when the coconut milk pays off.  Not only is it an excellent conditioner, but it makes the Henndigo mix a lot smoother so it rinses easier.  Since my hair is fine, I use a gentle non-SLS shampoo to get all of it out.

Once my hair is dry, it comes out a dark chocolate brown and it's so moisturized and thick.  I will admit that I use Henndigo to mainly cover my greys.  I have about 10% greys, but they choose to say hello right in the temple area for all to see.  I use Henndigo every other month or so, but sometimes I have to do it every 6 weeks depending on how fast my hair grows.


I have heard a lot negatives about Indigo use from different sources.  People complain that it fades too quickly, is unpredictable, dies out too quickly, etc. I just find that you have to understand Indigo so you can use it appropriately.  Indigo like Henna is a stain that lays atop the hair shaft so it does not change the hair molecules like chemical dyes.  The more you do it, the deeper the stain.  My only word of caution is that if you are not ready to commit to something permanent, then keep away from Henna/Indigo because it is not going to wash or fade out completely.

General Tips for a Successful Henndigo Application

1)  Outline your entire visible hairline with either petoleum jelly or a heavy oil before you begin or else any skin the paste touches will be orange for days.

2)  After applying the paste, clean any areas with paste on them, yourself, countertops, tiles, floor, etc. immediately.  The longer you let the paste sit, the more it will stain.  Immediately after drying on skin, the mud-like paste flakes right off.

3)  Henna has a very grassy earthy smell, you can use essential oils or apply scented oils like Monoi Oil to your hair after you rinse it out.

4)  Application is much easier when hair is damp.  You also tend to use less paste to saturate your hair than when it's dry.

Thursday, December 5, 2013

Improving my Henndigo Experience

I decided to take the plunge and order some high quality henna online.  I ordered from Henna Sooq.  Upon reading all the useful information on the site, I decided on 2 types of henna; the Rajasthani and Red Raj.  I want to eventually have a deep brown / burgundy color that will cover my greys.  And speaking of greys, I would like for them to be more in the wine family rather than stark pumpkin orange.

I had been experimenting with henna and indigo from the local markets.  But, upon reading all the reviews and seeing pictures of other users, who ordered their henna online, I decided to follow suit.  Since I have been researching henna recipes all over the place, I also tweaked my recipe and simplified my application method somewhat.

And this is how:

Henna Sooq Rajasthani Henna 64 g (1/2 cup)
Red Raj Henna 64 g (1/2 cup)
Indigo 32 g (1/4 cup)
16 oz Strongly brewed hot Raspberry tea
1 Lime (Juiced)
1 Tbs Conditioner
1/2 cup plain yogurt
2 Tbs Sea Salt (for Indigo)
_________________

- Mix hennas, tea, and lime juice in glass bowl

- Leave to dye release in bowl covered in plastic for at least 4 hours.  Afterwards, add yogurt and conditioner to henna mix

- Mix Indigo with warm water only (allow 15 minutes for dye release)

- Add salt to Indigo past and mix into Henna paste (mix really well and then mix some more)

- Apply to damp hair and put on a plastic shower cap.  Place woolen cap over shower cap

- Leave on for at least 5 hours and then wash out

- Do not wash again for 48 hrs

 There were a few very key points I observed this time around:

1) The henna powder was really finely sifted and was almost moist.  However, the moistness could be attributed because I kept my main batch in the freezer to prolong its life.

2) The Red Raj was more prone to becoming doughy, but in the end, it did mix well.

3) Once both hennas were mixed together, the smell was not as offensive as the cheaper henna I had been using.  The Rajasthani hardly  had any smell at all while the Red Raj had a stronger grassy smell, but neither smelled like any hint of manure.  I was VERY grateful for this!

4) There was almost immediate dye release.  As I was mixing it, it was already starting to turn brown and mixing it with the raspberry tea should help bring out the red tones in both hennas.  However, since the vendor recommended to let it sit and release for 4 hours, I wanted to follow the instructions as precisely as possible since these hennas were substantially more expensive than my usual stock.

5) When it was time to mix the indigo, it was also much more  "fresh" looking and did not smell on the stale side.  I let it sit for 10 minutes and I could see the blue / black layer sitting on top of the green paste.  This was something I had not experienced before with my store bought indigo.  I was definitely beginning to feel I had made the right decision by splurging on the better stuff.

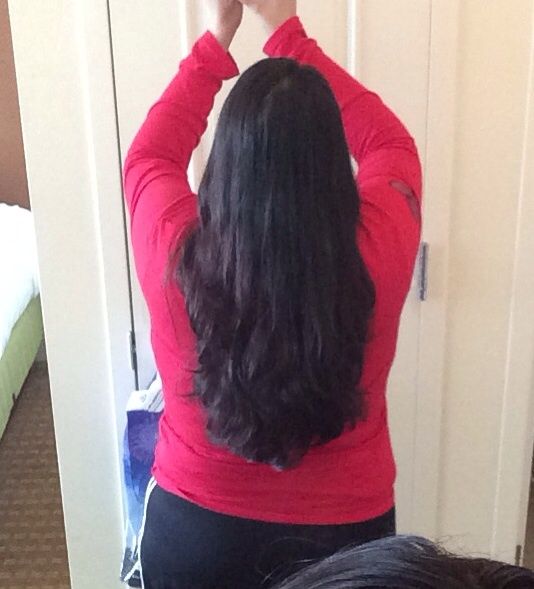
Sorry for the super greasy roots, but I wanted
to show my natural color in its virgin state


Lower half of length still has remnants of past chemical dye
and previous henna applications

6) The product was a bit less dense than the previous henna, but it was much easier to apply.  It penetrated the hair in a much different way.  It wasn't just sitting on top of the hair, but it was getting under each layer of hair.  The mix was thick enough not to be drippy even if it was more like warmed commercial cake frosting rather than Greek yogurt.

7)  Application overall was much neater and went much faster than usual.  In the end, cleanup was a breeze and I didn't have henna all in my ears, all over my forehead, or dripping down my back...yay!

I did have about a quarter of the mix left over, so of course, I bagged it and froze it.  I must admit that these 5 hours of waiting are a bit unnerving.  I am now thinking that the change will be much more dramatic than I may have originally anticipated.  I am also hoping for much more of a color blend in the different shades my hair has in it.  Previously, there was such a stark demarcation line from where the old chemical dye was growing out and my virgin hair.  I am definitely getting a serious trim in the Spring to start decreasing some of this much lighter area.

The color ended up much darker and closer to my natural color than I thought it was going to.  I only used 1/3 cup (43 g) of Indigo, but next time I will reduce it down to 1/4 cup (32 g).  I really like the color I ended up with and the greys at my temples were covered, which is what I was hoping for.  The grays are a little on the orange side, but they do blend in well with the rest of the hair.  I am assuming with future applications they will intensify towards red rather than remain orange.

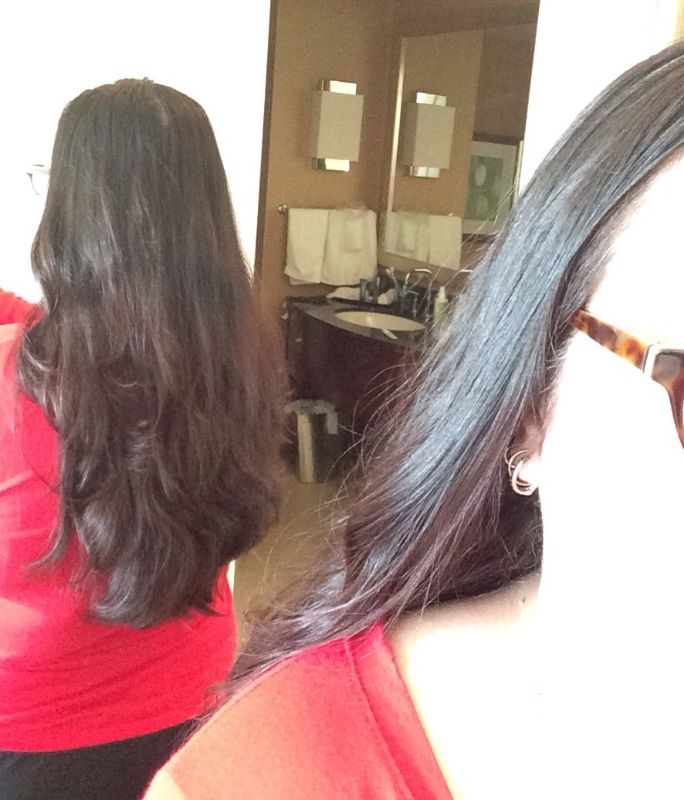
It's not as black as the picture shows.  It's a very dark brown
with a very intense burgundy sheen


Overall, although the better henna is more expensive and that increases even more with shipping, it was a good investment.  The intensity in saturation is so much better.  I really could not believe the difference.  My hair was having a hard time catching the color off of the bargain henna, and the results were really disappointing.  This time, the color is bonding to my locks!

Tuesday, October 8, 2013

2nd Day of Henndigo Treatment

This morning, I had my daughter take a picture of my hair in the sun.


I still see a big difference in the color above my ears vs the length of my hair.  If I am not in the actual sun, it's not really  noticeable, but in the sun, not so good!

I have some mix from Sunday's first treatment left over in the freezer.  I think I am going to apply it only to the top of my head to see if I can even out the color a bit more.  I love the way the bottom looks, but that cut-off line...not so cute!

Monday, October 7, 2013

My first Henndigo Experience – October 6, 2013

This morning, my daughter and I took a short trip over to Elmhurst to the Patel Brothers supermarket.  I grabbed 2 13 oz cans of Thai Coconut Milk, 1 package of Nupur henna powder, and 1 box of Seasons Iqra Indigo powder.  I was actually looking for the Jamila Indigo powder since I had read so many good things about it, but when they didn’t have it in stock at the time.  I was careful to select 100% Indigo that was of good quality.  

Hair in Sun Before Henndigo
Having found everything I needed and after having stopped at the convenient beauty supply store on Roosevelt Avenue, I got home and mixed both powders together.  According to some later research, that was mistake number 1.  You are supposed to mix the henna powder first with the coconut milk and some acidic solution.  I used 4 tablespoons of red table wine instead of the usual lemon juice.  That was mistake number 2.  The red wine apparently makes the henna stinkier.


I prepped my hair to be hennaed by washing it with Shea Moisture’s Moisture Retention Shampoo, and then followed that with some Come Clean Shampoo by Kinky Curly.  Since my hair is fine, a heavily conditioned shampoo will just weigh my mane down.  After I washed my hair, it was soft, tangle-free and really clean; all ready for my henndigo application.


I will admit I was nervous about 2 things: 1) my mixing the Indigo and henna together blunder, and 2) the fact that my hair already had some color variation due to an old chemical dye that over time, had severely oxidized.  It was quite unnerving not knowing exactly what color your hair is going to come out.  I figured if worse comes to pass, I will just bun it and wear it up tomorrow.  To be honest, I was planning to do that anyway since I found directions for a cute new braided bun online that I was planning to sport to work anyways.


Having to sit with this army green glop atop your head wrapped in Saran Wrap for the next 3 hours without knowing exactly what your hair will look like when the stuff comes off, is torturous.  It conjured up horrible images of weird clown orange streaks with mousy brown undertones.  Oh, boy! But, I decided to champion on since I had come this far.  After I began rinsing my hair, I did notice that the coconut milk had REALLY conditioned my hair.  I had to shampoo twice with Come Clean to get out all the henna / coconut milk mixture out of my hair.  I then applied a light conditioner to my hair to do away with any tangles.  After I got out of the shower, I applied my Devacurl anGel, but skipped my usual Monoi Oil since my hair had been so heavily conditioned.  The slip of my hair was good.  I am pretty certain it will be soft and bouncy once it dries.

As far as color, I didn’t end up with green or orange hair…yay! It is a rich dark brown mixed with bronze highlights.  Not all of the stubborn grey hairs were entirely covered, but most were, so it does give a more natural look.  It doesn’t look as if I purposely tried to cover up my greys.  They turned a coppery bronze.  I actually like that.  I tend to shy away from too much fake.  I find that whatever blunders I made along the way, worked for me.  I was nervous about the premature addition of the Indigo to the mix, but I had read in several places that it was ok to mix it while still in powder form.  I found the latter to be true.  It is amazing how much contradictory information there is.


All things considered, I am glad to report that my first henna experience was a good one.  I can’t wait to see the color after the first 3 days of oxidizing.  I would also like to comment on a few other points that I read most newbies to henna experience.  I didn’t find that the mix stained my tub, towels, skin, etc.  I didn’t find it necessary to newspaper the entire floor or the countertop of the sink.  Yes, the application was rather messy, but unless you get copious amounts all over the place, the henna dries pretty fast, and you are able to remove it with a dry paper towel, and whatever remains, can be removed with a damp paper towel.

As far as the tub, I found the henna was gritty as it was being rinsed off, but it did not clump and clog the drain as others have reported.  It went down smoothly.  I do believe that this is because it was mixed with the coconut milk, which did not make the mix dry like mud, but instead more like a water-soluble oily paste.

Normally, my hair is not super curly, but it has quite a pronounced wave to it, and at times, it tends to spiral in places.  I didn’t find that treating my hair with the henna loosened the wave at all.  It is still exactly the same as it was before the henndigo.  The other thing a lot of people tend to complain about is the smell of the mix.  It smells strong and very earthy.  I wouldn’t say it actually stinks, but it does have a pungently strong odor.  I found once I had rinsed and washed my hair, the smell did linger a bit.  It’s not overpowering, but it is still very much in my hair.  It is the smell of wet tropical forests.  I am assuming this odor will dissipate after the first 2 or 3 initial washings.

Below are the instructions for what I did this time around; what worked for me.

____________________________________________

Instructions for Henndigo

250 grams for waist length hair
_________________

1 Pack Godrej Nupur Henna 150 g
1 Box Seasons Iqra Indigo 100 g
2 Cans Chaokoh Coconut Milk
4 Tablespoons Red Table Wine
_________________

- Mix henna and Indigo powders while dry.  Add warm coconut milk while mixing to the consistency of yogurt
- Add red table wine to acidify the mix
- Leave to set in large sealed Ziploc bag for 5+ hours
- Apply to dry hair generously and wrap head in Saran Wrap.  Finish by slipping on a disposable plastic shower cap
- Leave for 3+ hours
- Wash out with Come Clean.  Use very light conditioner to detangle
- Do not wash hair for 48 hrs